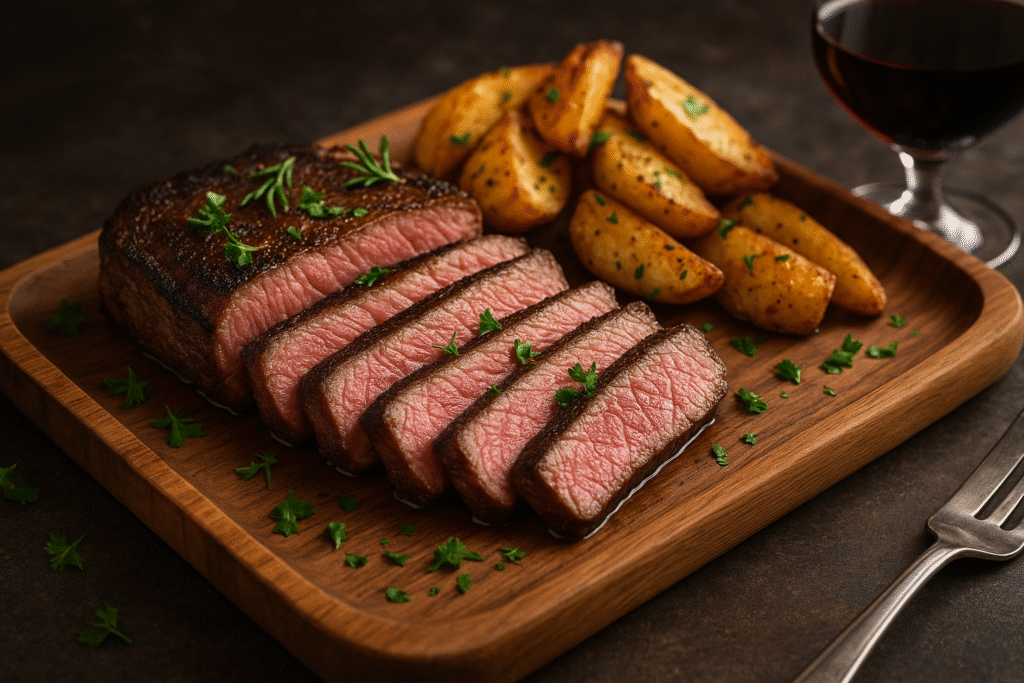
When it comes to cooking steak, everyone dreams of that perfect pink center with a crispy, flavorful crust. While many methods promise this result, there’s one technique that chefs, pitmasters, and food enthusiasts swear by — the reverse sear method.
This ultimate guide will break down everything you need to know: what the reverse sear is, why it works so well, step-by-step instructions, variations, and common mistakes to avoid. By the end, you’ll have the confidence to cook restaurant-quality steak right at home.
What is the Reverse Sear Method?
The reverse sear method is the opposite of traditional steak cooking. Instead of searing the meat first and finishing it in the oven, you slowly cook the steak at a low temperature (usually in the oven or smoker) and then finish with a quick, hot sear in a skillet or on the grill. READ MORE
This technique allows for even cooking, a more tender texture, and unbeatable flavor.
Why Use the Reverse Sear Method?
- Even Cooking – No more grey bands around the steak; the inside is perfectly pink.
- Better Crust – Searing at the end locks in flavor and creates a deep, golden crust.
- Temperature Control – Easier to hit your desired doneness (medium-rare, medium, etc.).
- Juicier Steak – The slow cooking retains moisture better than quick high-heat methods.
- Flexibility – Works in both oven + skillet or smoker + grill setups.
The Science Behind Reverse Searing
Steak cooks from the outside in. Traditional searing pushes heat rapidly into the meat, often overcooking the outer layer before the center reaches the right temperature.
By reversing the process, the steak gently cooks to the target temperature first, and then the high-heat sear develops that irresistible crust without overcooking the inside.
Step-by-Step: How to Reverse Sear a Steak
Step 1: Choose the Right Cut
The reverse sear works best with thicker cuts of steak (at least 1.5 to 2 inches thick). Ideal cuts include:
- Ribeye
- Porterhouse
- T-bone
- Strip steak
- Filet mignon

Step 2: Season Generously
Pat your steak dry and season with kosher salt and cracked black pepper. For added flavor, rub with garlic powder, paprika, or fresh herbs.

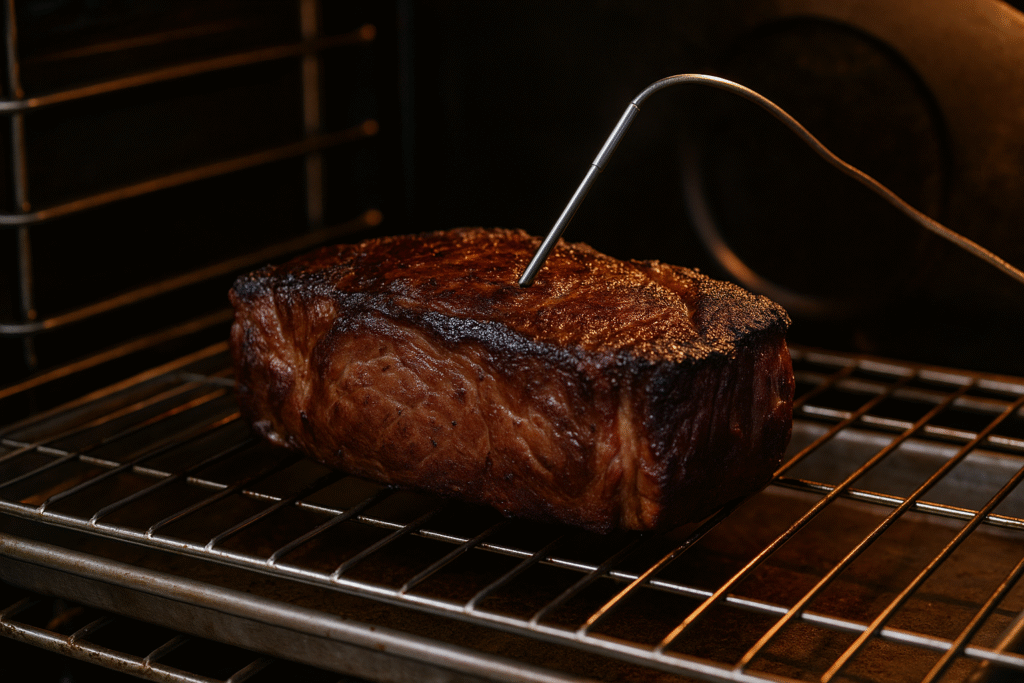
Step 3: Low & Slow Cooking
- Oven method: Preheat oven to 225°F (107°C). Place steak on a wire rack over a baking sheet. Cook until internal temperature reaches 10–15°F below your target doneness.
- Smoker method: Smoke at 225°F for deeper flavor.
Target Internal Temperatures (before searing):
- Rare: 115°F
- Medium-rare: 120–125°F
- Medium: 130–135°F
- Medium-well: 140–145°F
Step 4: Rest Before Searing
Remove steak from heat and let it rest for 10 minutes. This prevents juices from escaping during searing.
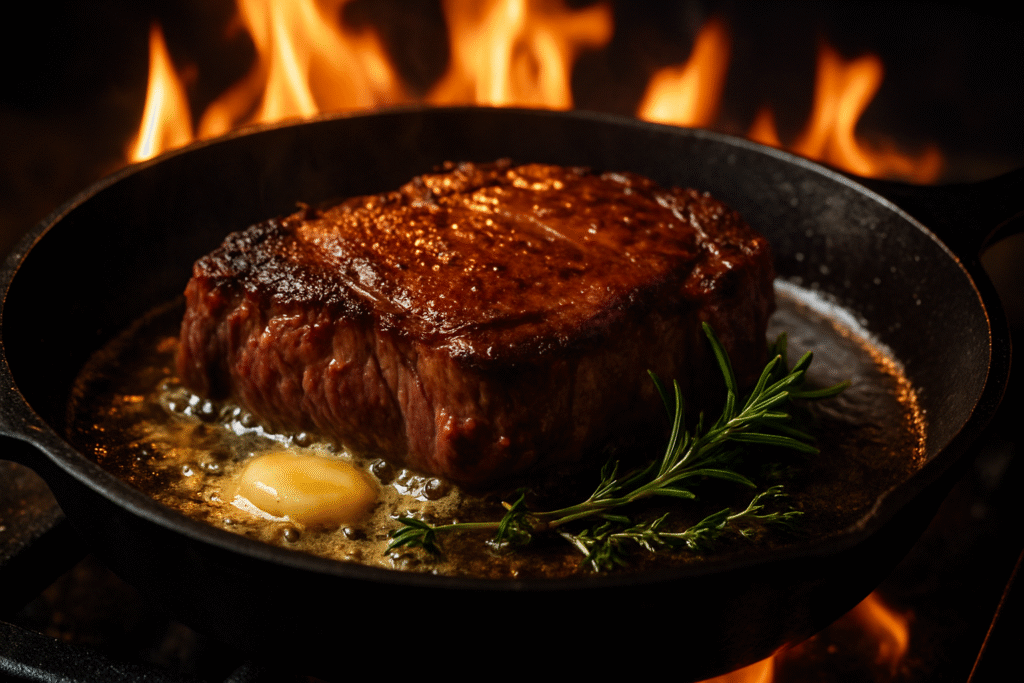
Step 5: High-Heat Sear
Heat a cast-iron skillet or grill to very high heat. Add a touch of oil with a high smoke point (like avocado or canola). Sear steak for 1–2 minutes per side, creating a dark golden crust.
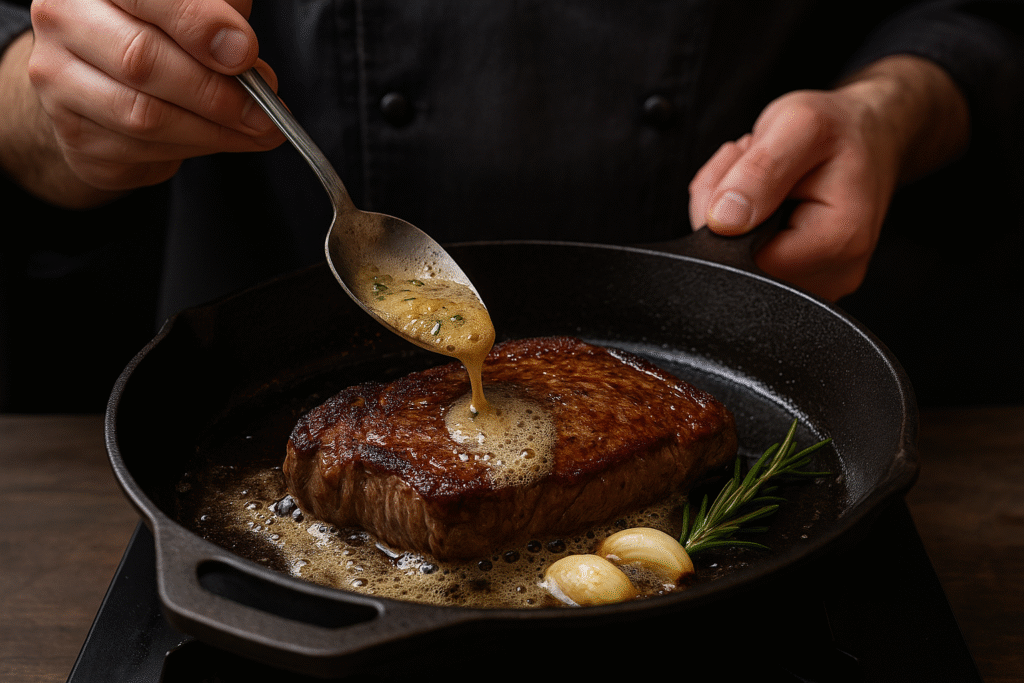
Step 6: Butter Basting (Optional)
During the final sear, add butter, garlic, and thyme to the skillet. Tilt the pan and spoon the melted butter over the steak for extra richness.
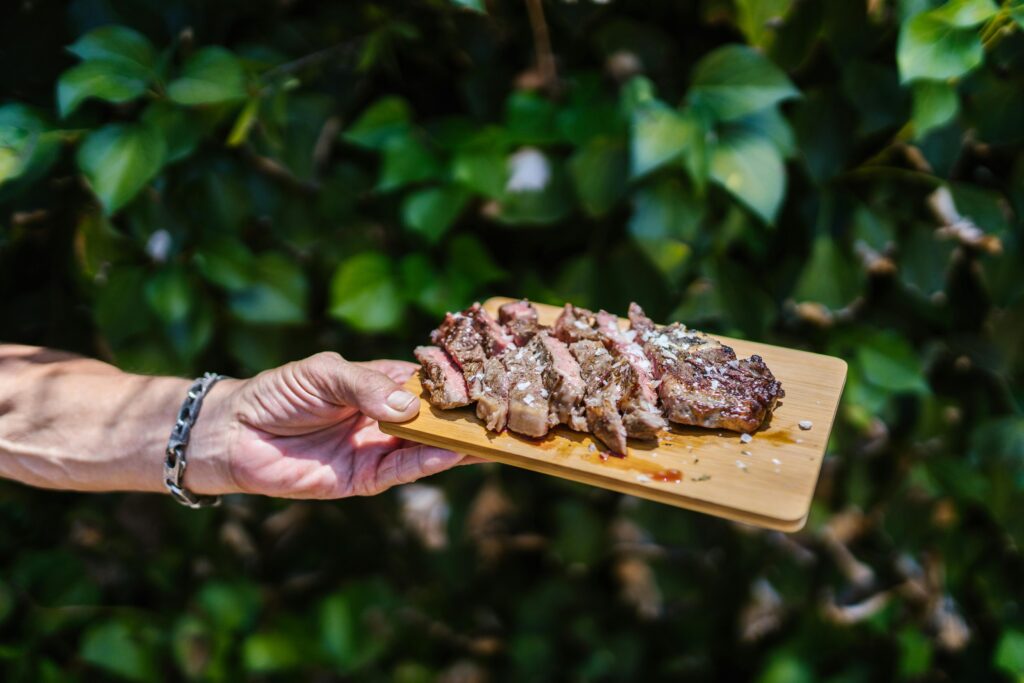
Step 7: Rest & Serve
Let the steak rest for 5 minutes before slicing against the grain. Serve with roasted vegetables, mashed potatoes, or a fresh salad.
Best Meats for Reverse Sear
While steak is the most popular, the reverse sear method also works for:
- Prime rib roasts
- Lamb chops
- Pork chops
- Thick chicken breasts
- Venison steaks
Mistakes to Avoid
- Using thin cuts – Reverse sear doesn’t work well for steaks under 1 inch thick.
- Skipping thermometer – You’ll risk overcooking without temperature precision.
- Not drying steak before sear – Moisture prevents crust formation.
- Overcrowding the skillet – Reduces heat, causing steaming instead of searing.
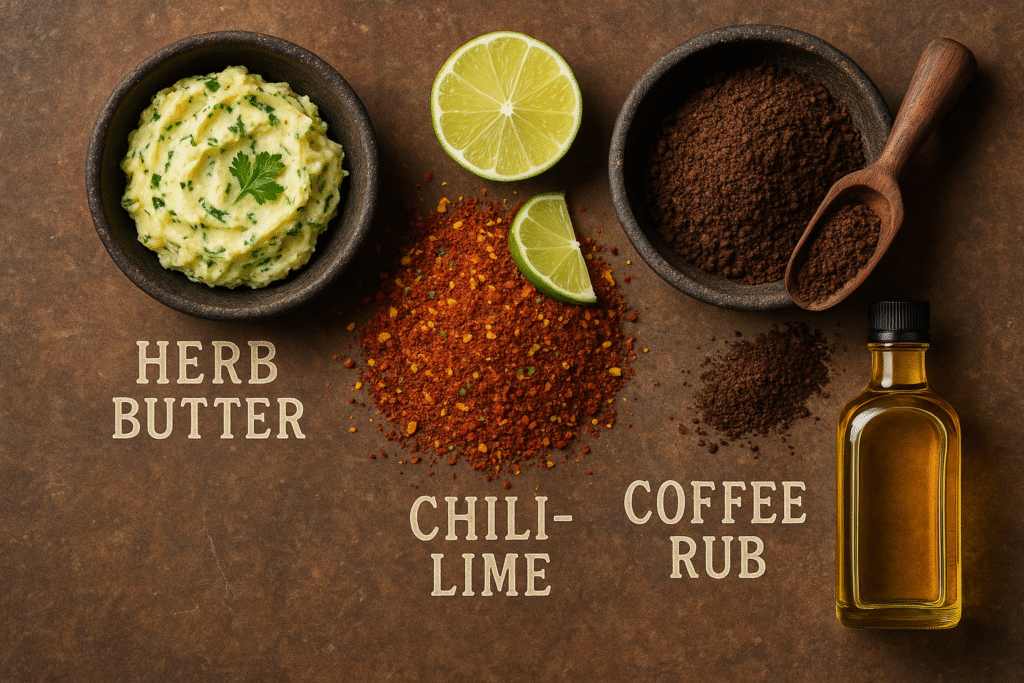
Flavor Enhancements & Variations
- Herb Butter Finish – Classic garlic-herb butter spooned over steak.
- Coffee Rub – Adds a smoky, bold flavor profile.
- Chili-Lime Marinade – Spicy and zesty, great for summer grilling.
- Truffle Oil Drizzle – For a gourmet twist.
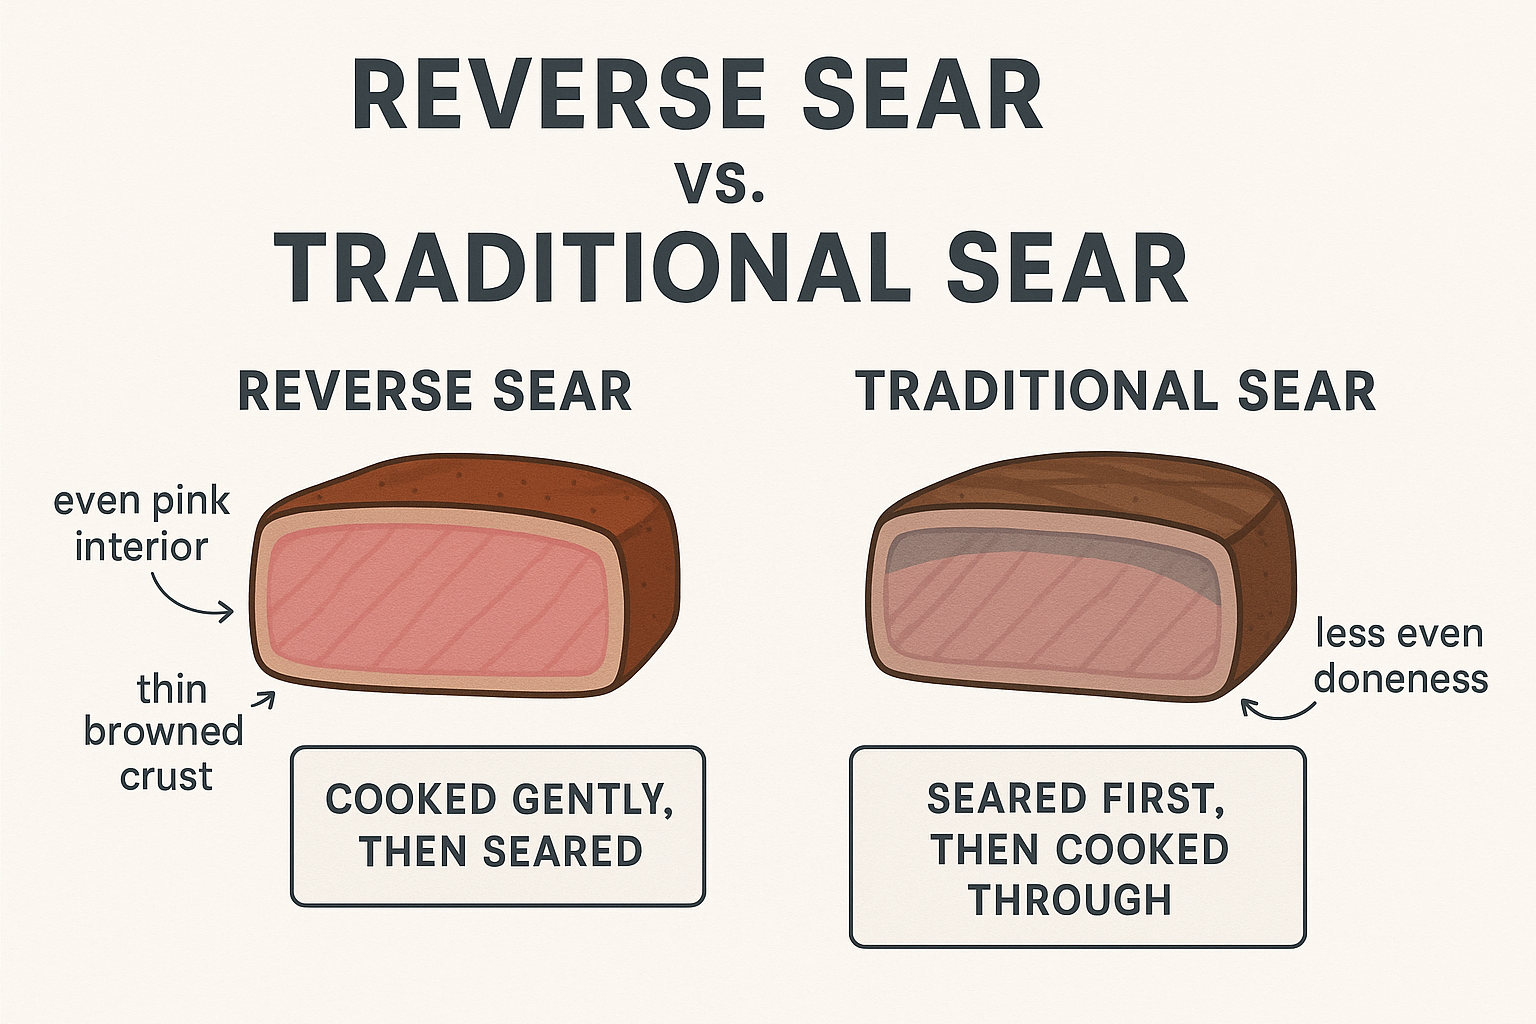
Reverse Sear vs. Traditional Sear
| Feature | Reverse Sear | Traditional Sear |
|---|---|---|
| Crust | Last | First |
| Doneness | Even throughout | Often uneven |
| Control | High | Moderate |
| Best for | Thick cuts | Thin cuts |
FAQs on Reverse Sear Method
1. Can I reverse sear any steak?
Works best with thick cuts (1.5+ inches). Thin cuts cook too quickly for this method.
2. Should I use oven or smoker?
Both work — oven for convenience, smoker for added flavor.
3. Do I need a cast iron skillet for searing?
Yes, cast iron holds heat best and delivers the crispiest crust.
4. Can I reverse sear chicken or pork?
Yes, the method works well on thicker cuts of poultry and pork.
5. How do I know when it’s done?
Always use a meat thermometer — it’s the most reliable way to ensure doneness.
Conclusion
The reverse sear method isn’t just a trend — it’s a game-changer in cooking steak. By gently cooking meat first and finishing with a blazing sear, you get the best of both worlds: a perfectly cooked interior and a crust that crackles with flavor.
Whether you’re hosting a dinner party, firing up the smoker for a weekend BBQ, or just craving the perfect ribeye, mastering the reverse sear will take your cooking to the next level.
So grab a steak, season it right, and remember — the secret to steakhouse-quality flavor is all about going in reverse.
Recent Articles:
Smoked Leg of Lamb (Ultimate BBQ Guide)
Lamb Marinade: The Ultimate Flavor Guide for Perfectly Tender Meat
Pulled Pork Rub: The Ultimate Flavor Guide for Juicy, Smoky Perfection